Assemble
There is one more step left before putting together the parts.
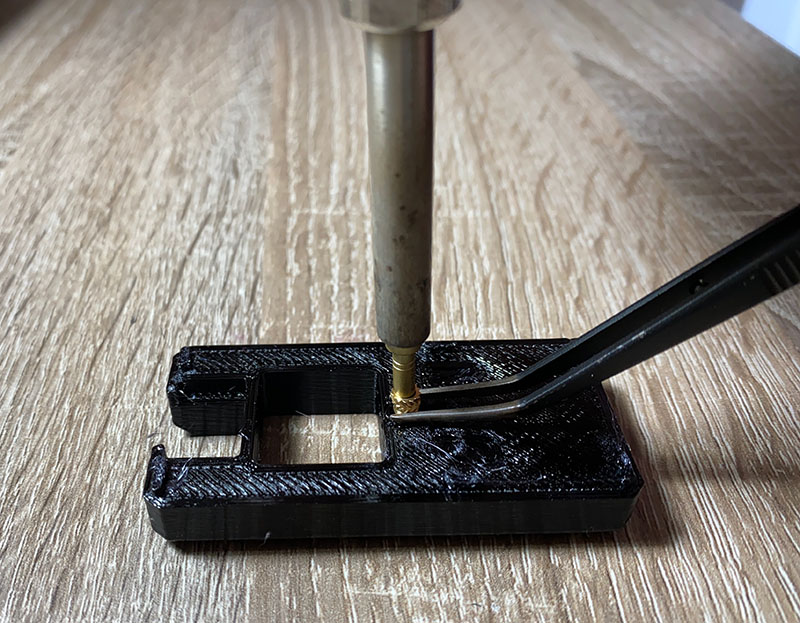
Put in the threaded insert
Use a soldering iron. If you have the special soldering tips, use those. Otherwise use a conical soldering tip.
Heat the soldering iron to a temperature about 20° above the printing temperature of your filament. For example, we use 250° for PETG.
Place the top part of the enclosure with the hole facing up. Hold the threaded insert against the hole with tweezers and carefully push it in with the soldering iron until it’s flush with the surface. Do not apply too much force.
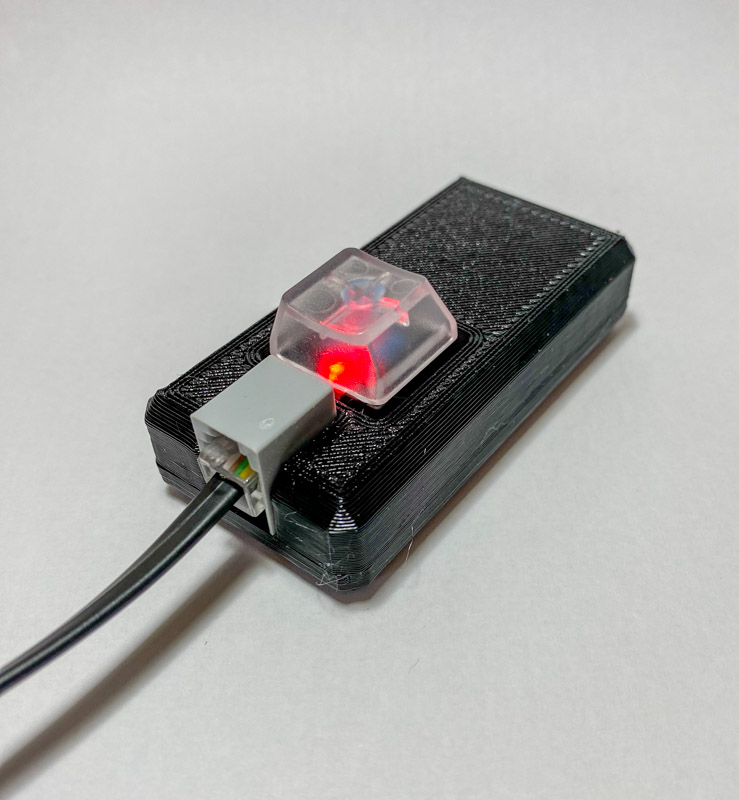
Screw the parts together
- Sandwich the assembled PCB between the two halves of the enclosure. The two halves should fit together with no gap in between them. If there’s a gap, try pushing a little bit until the parts snap together.
- Screw everything together with a single 6mm M2.5 bolt.
- Put on the key cap.
Done!
Congratulations! You have assembled your own Kamaji button. Rinse and repeat!